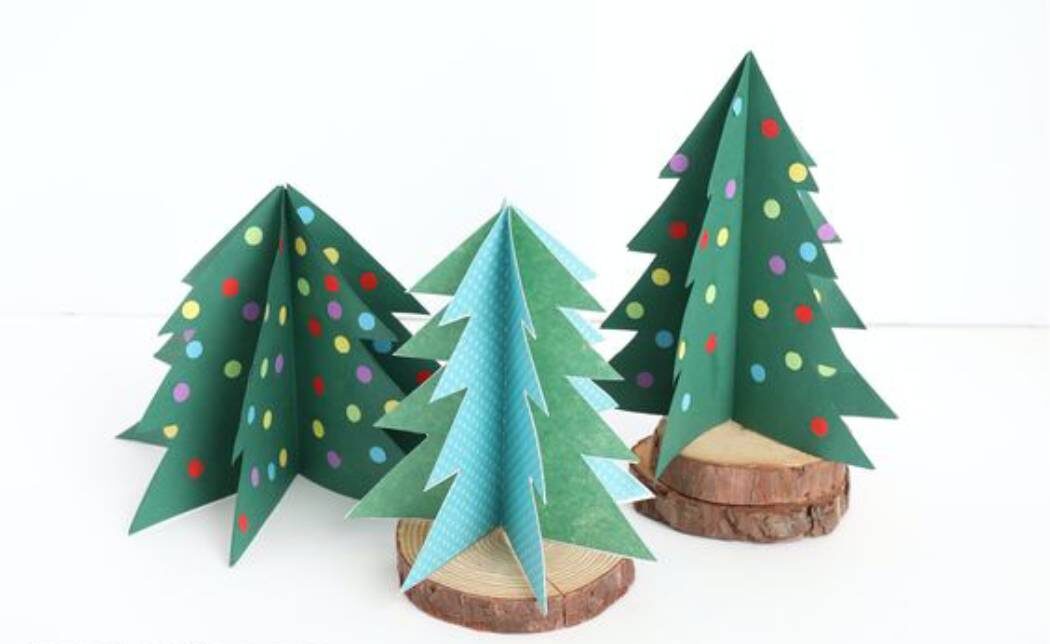
Festive season draws near, there’s a delightful way to usher in the holiday spirit with a touch of handmade charm. This step-by-step “how to make a Christmas tree from paper” guide will ignite your creative spirit to infuse your home with the joyous essence of the season. Let’s imagine bringing the warmth and magic of Christmas into your home by crafting a beautiful Christmas tree from the simplicity of paper, and make it real!
Contents
Material Needed to Craft a Christmas Tree from Paper
Crafting Christmas trees from paper is a simple and accessible project which is perfect for individuals of all ages. So you can make it an amazing occasion gift when inviting loved ones to get creative with you. How to make paper Christmas tree is a delightful and budget-friendly craft project.
Here’s a list of materials you’ll need to get started:
- Paper (green, yellow, red,…)
- Scissors
- Glue or Tape
- Markers or Pens
- Decorative Items (Optional)
- Wooden Dowel
Feel free to adapt the materials based on your preferences and the type of paper Christmas tree you want to create. Gather your materials, clear a creative space, and enjoy the process of bringing a festive paper tree to life!
Step-by-step Guide on How to Make a Christmas Tree from Paper
Our step-by-step guide will walk you through the process, turning simple materials above into a bespoke gift for Christmas, a delightful holiday centerpiece. The art of making a charming Christmas tree will bring joy and a personalized touch to your seasonal decorations. Let the crafting festivities begin!
- Step 1: Crafting the Tree Outline and Cutting
You can begin your ways of decorating Christmas with a paper tree by either sketching a 2D Christmas tree on your chosen paper or utilizing a pre-printed pattern template. Carefully cut around each pattern piece, ensuring you use paper in your preferred color – be it the classic green or a unique palette of colors like yellow or red, elevating the charm of your tree.
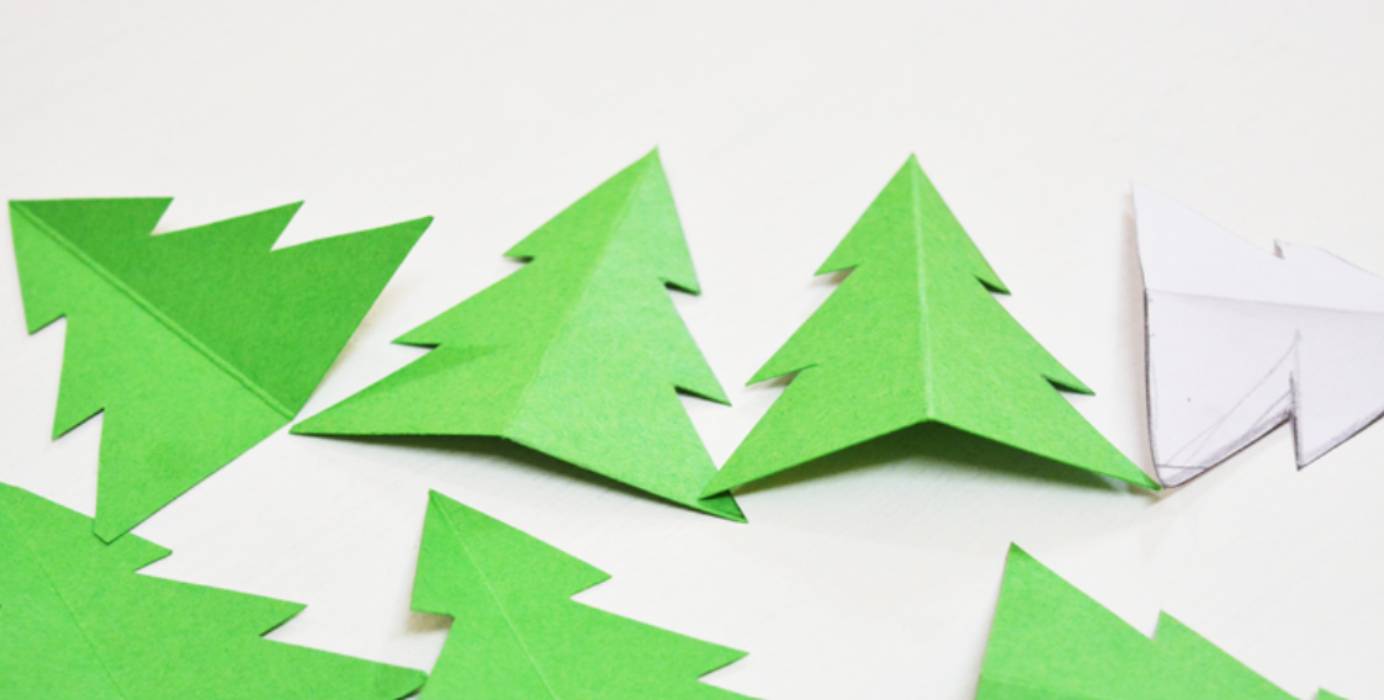
Then, use a pair of scissors, cut out the tree shape along the solid lines, creating six pieces of each tree.
- Step 2: Constructing the 3D Christmas Trees
To assemble the trees is the main step of how to make a Christmas tree from paper. To do that, let’s apply a line of glue along the outer edge of one side of a tree piece, leaving a section unglued at the base’s center (approximately 1/2 inch) for inserting the dowel later. Gently press a second tree piece on top, ensuring the glued edges adhere. Fold back the unglued side of one piece, apply more glue along the exposed outer edge, and press another tree piece on top, connecting the edges.
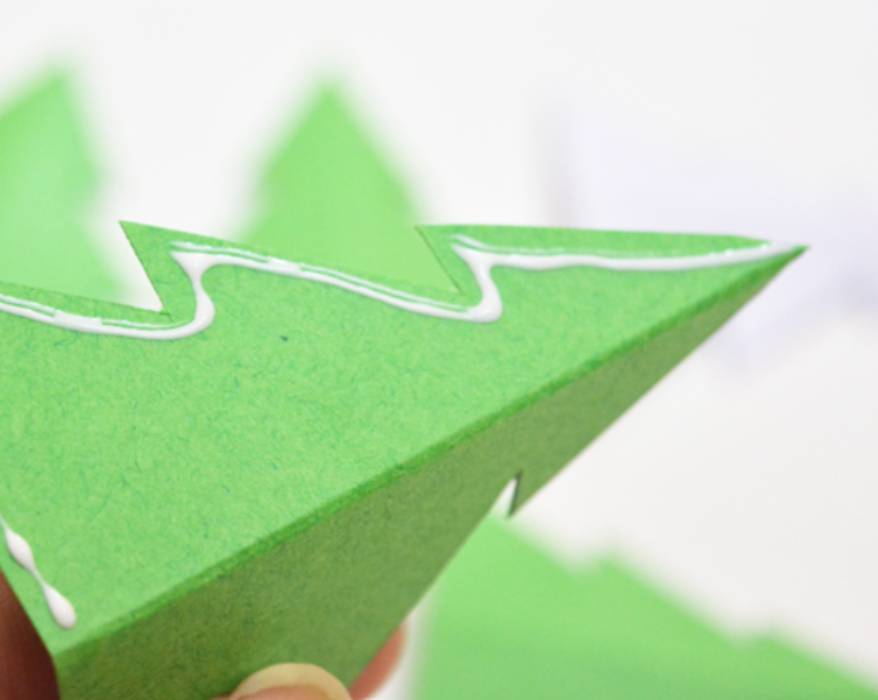
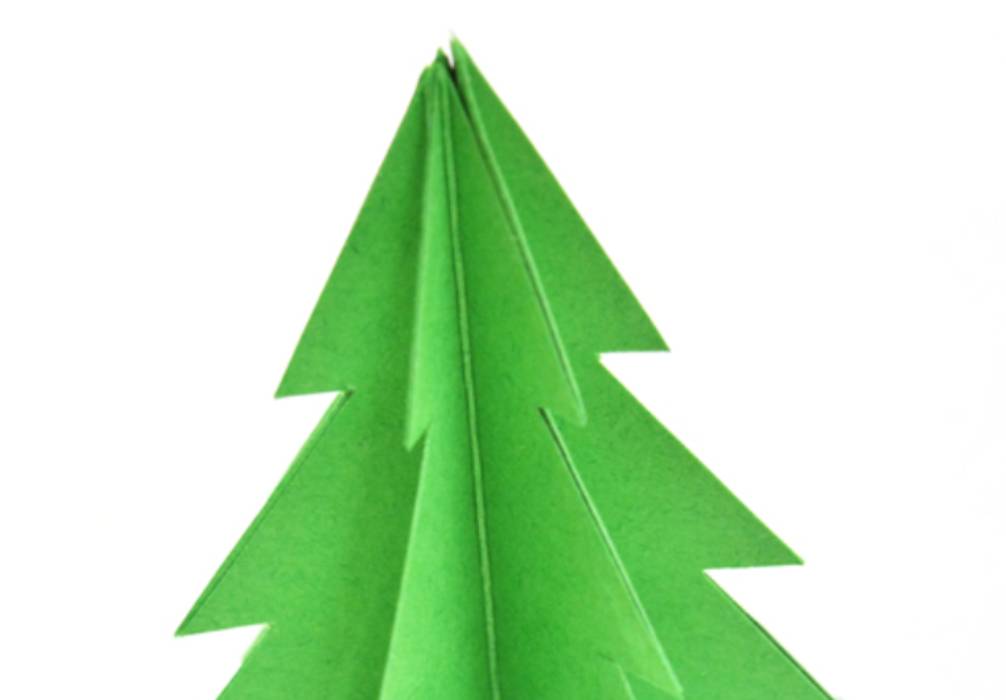
Repeat this process with the remaining tree pieces, folding each outward and gluing the inner edge to the adjacent piece. When you finish gluing the 6 pieces of leaves together, it means you have basically shaped your Christmas tree.
- Step 3: Decorating Paper Christmas Tree
Just like when discovering how to decorate a Christmas tree, the possibilities of decorating a paper one are also endless. Be as creative as you like with the optional ornament you prepared for our process of how to make a Christmas tree from paper. Introduce sparkle with paint or glitter glue or simulate a snow-covered appearance on your tree. Craft ornaments by cutting colored paper using scissors or a hole punch, then affix them to the tree with glue.
Another suggestion is fashioning a garland using metallic thread or ribbon, and ensure to crown your creation with a tiny star or angel on top. Hot glue is the preferred adhesive for securing items to the tree’s points.
- Step 4: Creating the Tree Base
Drill a hole in the center of the stump, matching the size of the wooden dowel. Apply a small amount of hot glue into the drilled hole on the wood round, then insert the dowel. Thread the top of the dowel through the center of the tree pieces, pressing it upward to the top.
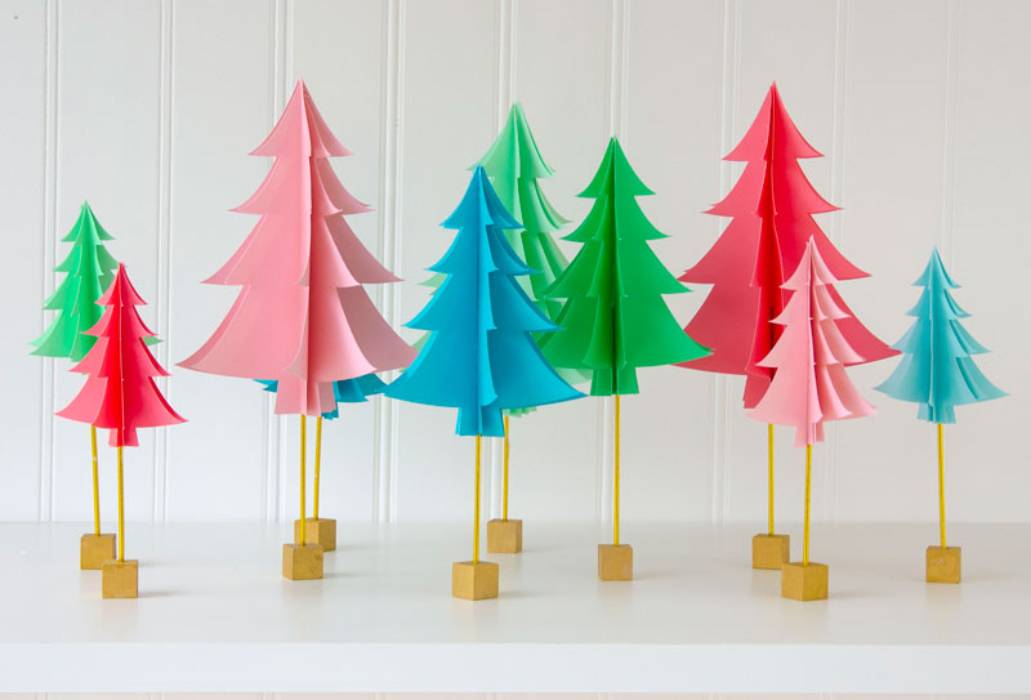
If needed, add hot glue at the top and bottom of the tree to finish our “how to make a Christmas tree from paper” journey, in order to securely hold the dowel in place, ensuring your 3D paper Christmas tree stands tall and enchanting.
Decorating Ideas with Paper Christmas Tree
After completing your adorable paper Christmas trees, you may be wondering what places you can use them to decorate? Actually, a paper Christmas tree offers a versatile and creative approach to spreading holiday cheer throughout your home. Here are various places where you can showcase and enjoy your masterpiece:
- Tabletop or Mantel: Place a small or medium-sized paper Christmas tree on a tabletop or mantel. This is a classic and central location that can serve as a festive focal point.
- Window Sills: Display your paper tree on a window sill, allowing it to be visible from both inside and outside. Consider adding twinkling lights for an extra enchanting effect.
- Work Desk or Office: Bring the holiday spirit to your workspace by placing a modest-sized paper tree on your desk. It adds a touch of festive decor to your daily surroundings.
- Hanging from the Ceiling: If suspending your 3D Christmas trees from the ceiling, make them lighter by removing the base. This decoration idea adds a whimsical and unexpected touch to the decor.

Feel free to get creative and experiment with different locations to find the perfect spot for your paper Christmas tree. No matter where you place it, your handmade creation is sure to bring holiday joy and a touch of whimsy to your home.
Final Thought
Transforming a simple sheet of paper into a festive Christmas tree is not just a craft; it’s a joyful journey of creativity and personal expression. The whole process allows you to infuse your holiday decor with a unique touch. From cutting and assembling the tree to adding personalized ornaments and decorations, every step in our guide is an opportunity to make the holiday season truly your own.
So, let’s repeat our journey to make more paper Christmas trees!


